


How to Use a Dog Nail Grinder for Beginners
Table of Contents
- Why a Dog Nail Grinder Works Better Than You Think
- Dog Nail Grinder vs Clippers: Which Should You Choose
- Getting Your Grinder Ready: Equipment and Setup
- How to Introduce a Dog to a Nail Grinder Gradually
- Step-by-Step: Using the Dog Nail Grinder Safely
- How Far to Grind Dog Nails and How Often to Trim
- Common Mistakes and What to Do If Something Goes Wrong
- Frequently Asked Questions
Last Updated: October 17, 2026
Why a Dog Nail Grinder Works Better Than You Think
A dog nail grinder is an electric tool that smooths and shortens your dog's nails using a rotating bit instead of cutting them like clippers do. Many dog owners find it gentler and more controlled than traditional clippers. The grinding action creates a smooth finish that reduces sharp edges and the risk of splitting nails.
The real advantage? You get a buffer against mistakes. With clippers, one slip cuts too short and hits the quick. With a grinder, you're shaving away tiny amounts. Your dog stays calmer because the process feels less scary. Plus, the smooth finish means less snagging on furniture and fewer scratches on your skin.
The learning curve is real, but once you nail the technique, nail maintenance becomes straightforward.
Dog Nail Grinder vs Clippers: Which Should You Choose
Both tools work, but they suit different situations. Clippers are faster for dogs with light-colored nails where you can see the quick easily. They're also cheaper upfront and need no battery or charging. The downside: one wrong squeeze and you've cut too short.
Grinders take longer per nail but give you precision and control. You can see exactly how much nail you're removing. They're better for dark nails where you can't see the quick. They're also quieter than you'd expect and less likely to cause injury.
Here's the honest comparison:
| Factor | Clippers | Grinder |
|---|---|---|
| Speed per nail | Fast | Slower |
| Precision | Lower (risk of cutting too short) | Higher (gradual removal) |
| Best for | Light-colored nails, experienced owners | Dark nails, nervous dogs, beginners |
| Noise level | Silent | Low hum |
| Learning curve | Minimal | Moderate |
| Injury risk | Higher if you slip | Lower (gradual removal) |
Most beginners do better starting with a grinder. You get more room for error, and your dog adjusts faster to the sensation than to clipper pressure.
Getting Your Grinder Ready: Equipment and Setup
Before you touch your dog's paws, gather what you need. A good setup prevents stress for both of you.
Essential items:
- A rechargeable dog nail grinder with adjustable speed
- Treats (high-value ones your dog loves)
- A quiet, well-lit space
- Styptic powder (in case you nick the quick)
- A towel or mat for grip
- Your dog's favorite toy or chew (optional distraction)
The Dog Nail Grinder USB Rechargeable Electric Pet Claw Trimmer from Dream Deal Shop is built for beginners. It has low-noise technology and a 2-speed setting, so you can start slow with smaller dogs and adjust for larger nails.
Understanding grinder speed and bit selection
Speed matters more than you think. Most grinders offer two settings: low speed and high speed.
Start with low speed. It's quieter, generates less vibration, and gives you better control. Use high speed only for thick nails on large dogs once you're comfortable.
Bit selection depends on your dog's size. Most grinders come with three grinding ports:
- Small port - for toy breeds and small dogs
- Medium port - for medium dogs and regular nails
- Large port - for large breeds and thick nails
Pick the right port and you'll have better contact with the nail. Wrong port? The grinder won't work as effectively, and your dog feels more vibration.
How to Introduce a Dog to a Nail Grinder Gradually
This is where most people rush, and it's where things go wrong. Your dog doesn't know what this tool is.
Week 1: Desensitization to the tool itself
Let your dog see the grinder. Leave it on a table while you play with them nearby. No pressure, no touching. Just existence.
Then hold it (turned off) near their paw for a few seconds. Reward with a treat. Repeat 3-4 times.
Week 2: Sound introduction
Turn the grinder on (away from your dog). Let them hear it from across the room. Keep it brief. Reward calm behavior.
Gradually move the running grinder closer over several sessions. Your dog should stay calm before you move to the next step.
Week 3: Touch without grinding
Hold the grinder near your dog's paw (still running). Don't touch the nail yet. Just let them feel the vibration on their leg.
Then lightly touch one nail with the grinder (still running). One second. Treat. Stop. Repeat 2-3 times per session.
Building tolerance to sound and vibration
Some dogs adapt fast. Others need weeks. There's no rush.
The vibration bothers dogs more than the sound. Start by letting them feel it on their leg, not their nail. Once they're used to that, move to the paw. Once they're calm on the paw, touch a nail.
Each session should last 5-10 minutes max. Your goal is "calm acceptance," not "excited enthusiasm." Calm is enough.
Signs your dog is ready:
- Stays still when you hold their paw
- Doesn't pull away from the vibration
- Ears aren't pinned back (sign of stress)
- Tail is neutral or wagging slightly
Signs to slow down:
- Panting heavily
- Trying to escape
- Whining or yelping
- Shaking
If you see stress signals, stop. Go back to the previous step for another week. There's no deadline here.
Step-by-Step: Using the Dog Nail Grinder Safely
Once your dog tolerates the grinder, here's how to actually use it.
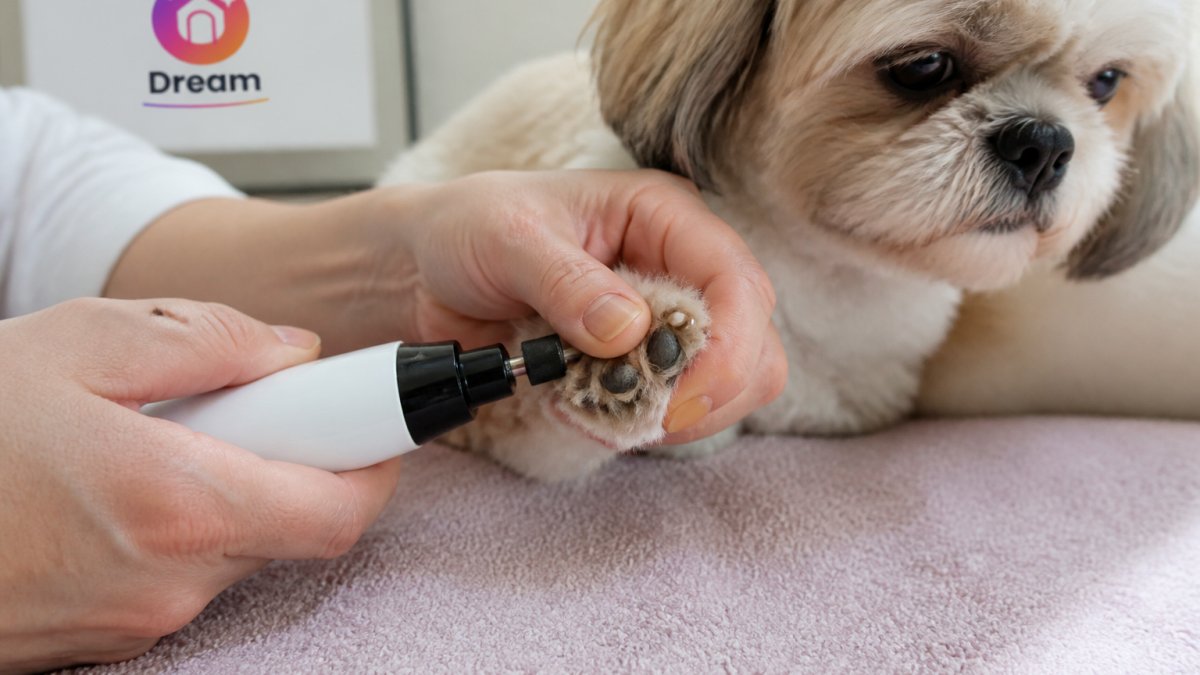
Total time per session: 10-15 minutes for all four paws
Difficulty: Beginner-friendly with practice
Positioning and handling the paw
Positioning is everything. A secure paw means better control and a calmer dog.
Sit on the floor or a low chair so you're at your dog's level. Have your dog sit or lie down in front of you. Hold their paw gently but firmly in your non-dominant hand. Your thumb should be on top of the paw, fingers underneath. Don't squeeze. Just steady.
Use your dominant hand to hold the grinder. Rest your wrist on your leg or the armrest for stability. Shaky hands = shaky grinding = unhappy dog.
Start with the front paws. They're easier to reach and your dog sees what you're doing. Back paws come later once you're confident.
Dog Nail Grinder USB Rechargeable Electric Pet Claw Trimmer – Painless, Low →
Identifying the quick and avoiding injury
The quick is the blood vessel inside the nail. If you hit it, it bleeds and hurts. You want to avoid it completely.
Light-colored nails: You can see the quick as a dark dot in the center. Grind around it. Stay on the outer edge.
Dark nails: You can't see the quick. This is why grinders are safer for dark nails. You grind a little, check the tip, and look for a small dark circle in the center. Once you see it, you know you're close. Stop grinding.
The safe approach: grind, check, grind a little more. Never grind aggressively on dark nails.
Grinding technique: tip and underside
Angle matters. Most beginners grind straight down, which is wrong.
Hold the grinder at a 45-degree angle to the nail. Grind the tip first (the pointy part). Then angle the grinder slightly and grind the underside where the nail curves. This creates a smooth, rounded edge.
Work from the outside in. Never grind straight into the center of the nail from the top. That's where the quick is hiding.
Grind for 2-3 seconds, then check. Light pressure only. Let the grinder do the work. You're not sanding a deck.
One nail at a time. Finish one completely before moving to the next. This keeps your dog calm because each step is quick and predictable.
How Far to Grind Dog Nails and How Often to Trim
The right length depends on your dog. Generally, nails should be short enough that they don't click on the floor when your dog walks.
If you hear clicking sounds, the nails are too long. Grind them down until the clicking stops. If your dog's nails naturally grow fast, you'll trim every 4-6 weeks.
Check your dog's nails weekly. This habit helps you catch overgrowth early before it becomes a problem.
How much to grind per session:
Grind until you see a tiny dark circle (the quick) starting to show in the nail's center. That's your signal to stop.
On light nails, this is obvious. On dark nails, you're looking for that small dark center dot. Once you see it, you're done.
If you accidentally nick the quick and it bleeds, apply styptic powder immediately. It stops bleeding in seconds. Your dog will be fine. It stings a little, but no permanent damage.
Common Mistakes and What to Do If Something Goes Wrong
Mistake 1: Grinding too aggressively
New grinder users often press hard, thinking it speeds things up. It doesn't.
Fix: Light pressure only. Let the grinder do the work. You're guiding it, not pushing it.
Mistake 2: Skipping the desensitization phase
You're excited to get started, so you skip weeks 1-3 and jump straight to grinding. Your dog panics.
Fix: Go back to week 1. Spend the time. It pays off in a calm, cooperative dog.
Mistake 3: Grinding for too long
Your dog's nail heats up from friction. After continuous grinding, the nail gets warm.
Fix: Grind in short bursts. Check. Stop. Move on.
Mistake 4: Using the wrong speed
High speed on a nervous dog or a puppy is a recipe for disaster.
Fix: Always start on low speed.
If you nick the quick:
- Stop immediately.
- Apply styptic powder to the bleeding nail.
- Hold it there for a few seconds.
- The bleeding stops. Your dog is fine.
- Take a break. Don't grind more nails today.
Your dog might be nervous next time, so spend extra time on treats and positive reinforcement at the next session.
If your dog panics:
Stop. Don't force it. Take a week off and restart the desensitization process.
Keeping your dog's nails trimmed matters for their comfort and health.
Frequently Asked Questions
How far should I grind my dog's nails with a grinder?
Grind until the nail is smooth and short, stopping before you reach the quick (the pink or dark center). For light-colored nails, you'll see the quick clearly. For dark nails, grind gradually and check the underside, you'll see a small dark dot appear as you approach it. Stop grinding before that point. Short sessions on one nail at a time help you stay in control and avoid heat buildup.
How do you introduce a dog to a nail grinder without stress?
Start by letting your dog see and sniff the grinder while it's off. Next, turn it on nearby but don't use it yet, reward calm behavior with treats and praise. Gradually move the running grinder closer to your dog's paw over several sessions. Touch the grinder (off) to one nail, then turn it on and touch it very briefly to a nail. Build up to a full grind over days or weeks. Patience and positive reinforcement make the difference.
How often should I trim my dog's nails with a grinder?
Most dogs need nail trimming every 3-4 weeks, though this depends on activity level and nail growth rate. Active dogs that run on hard surfaces wear nails down naturally and may need less frequent trimming. Indoor or less active dogs often need more frequent care. Check your dog's nails regularly, if they click on the floor or curl, it's time to grind. Regular short sessions are easier on both you and your dog than waiting until nails are overgrown.
What should I do if I accidentally nick the quick?
Stay calm, minor nicks bleed but are not dangerous. Apply styptic powder or cornstarch directly to the bleeding nail to stop blood flow. If you don't have styptic powder, apply gentle pressure with a clean cloth for a short time. Avoid getting water on the nail for a few hours. Monitor the paw for infection over the next few days. If bleeding doesn't stop or the paw shows signs of infection, contact your vet.